
Official noson® product instructions
Use, clean and store correctly
Here you will find the video guide for correctly fitting the noson® nasal dilator and the binding, material-friendly hygiene routine from the booklet Close to the Skin & Germ-Free.
Video guide
Fit Noson Generation 2 correctly
The video shows step by step how to position the nasal dilator and adjust it to the nose. It should fit securely and comfortably – do not bend it excessively or force it.
- Clean and dry your hands before touching it.
- Position the nasal dilator carefully and align it symmetrically.
- Check the fit; do not ignore pressure points or pain.
- After use, check the product condition and complete the hygiene routine.
Cleaning in six steps
How to clean the noson® nasal dilator
The routine follows the care instructions in the hygiene booklet. The aim is a visibly clean, completely dry and intact product – not a guarantee of sterility.
- 1Prepare your hands
Clean and dry your hands completely. Touch the product only with clean, dry hands.
- 2Remove visible residue
Remove grease, sweat, cosmetics, dust and visible deposits from the outer contact surfaces.
- 3Clean the outside only
Clean with lukewarm water and mild soap. Treat transition and connection areas especially carefully.
- 4Do not soak or rinse under pressure
Do not soak for long periods or use high pressure. Do not force liquid under pressure into connection areas.
- 5Dry completely
Dry all areas thoroughly, then allow them to air-dry completely. Residual moisture must not be trapped.
- 6Inspect and store cleanly
Check for residue, deposits, discolouration, cracks or deformation. Store only when dry in the clean box supplied.
Hygiene booklet · Page 11
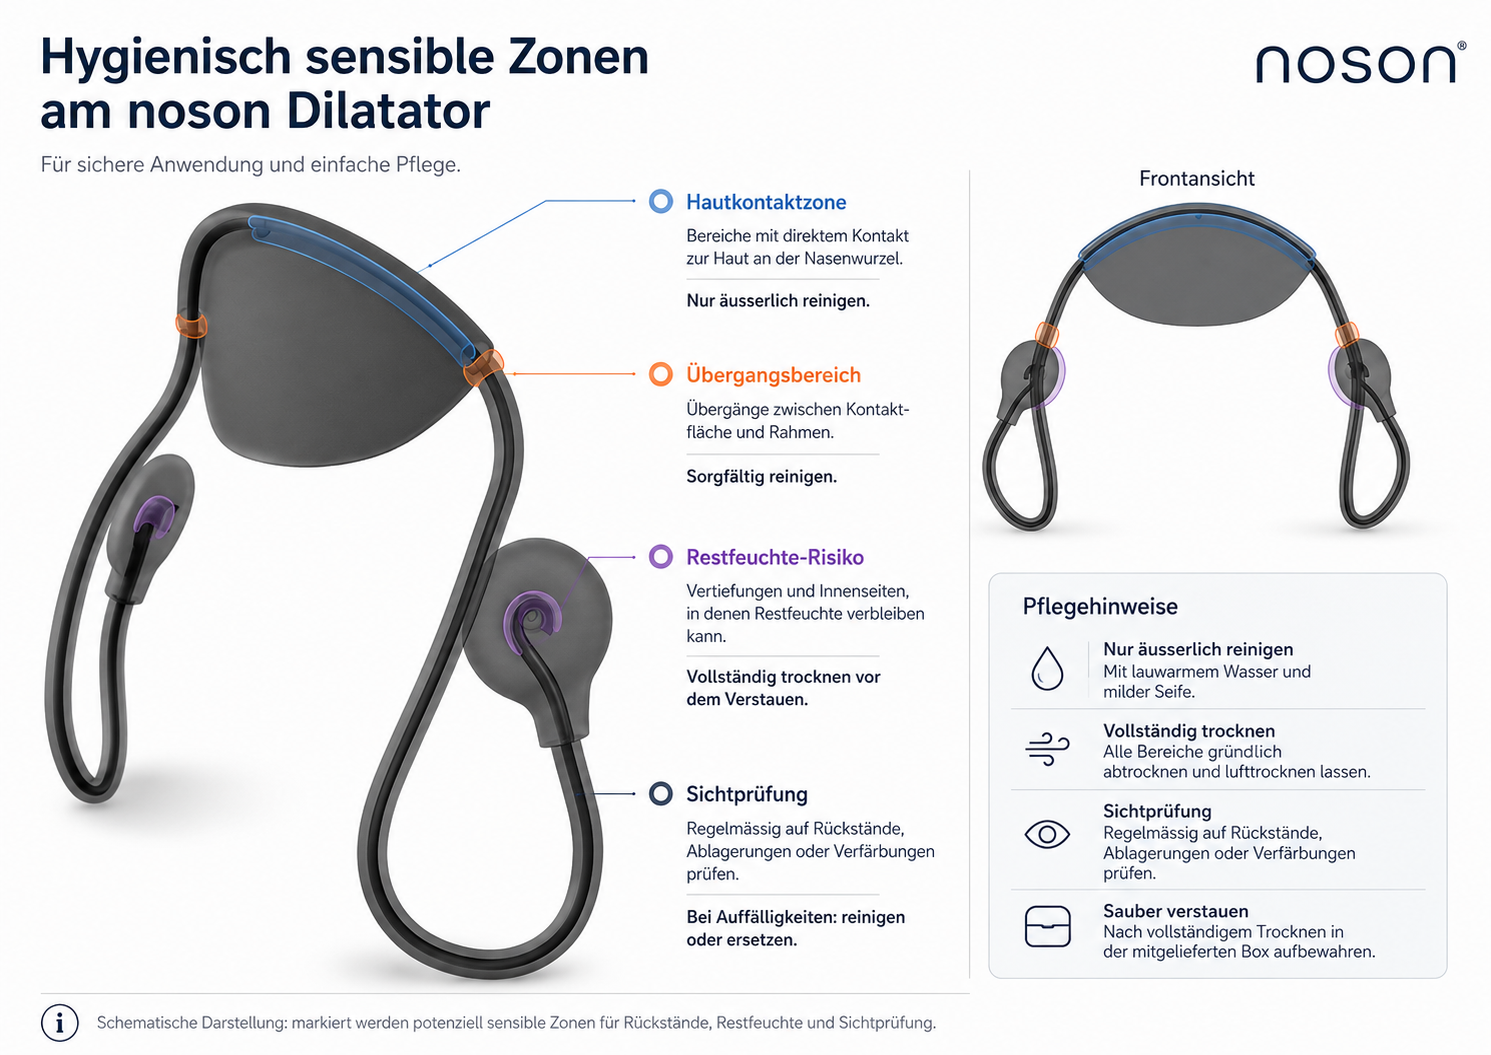
Identify hygiene-sensitive zones
The diagram marks the skin-contact zone, transition areas, recesses with a residual-moisture risk and the points for regular visual inspection.
Hygiene booklet · Page 12
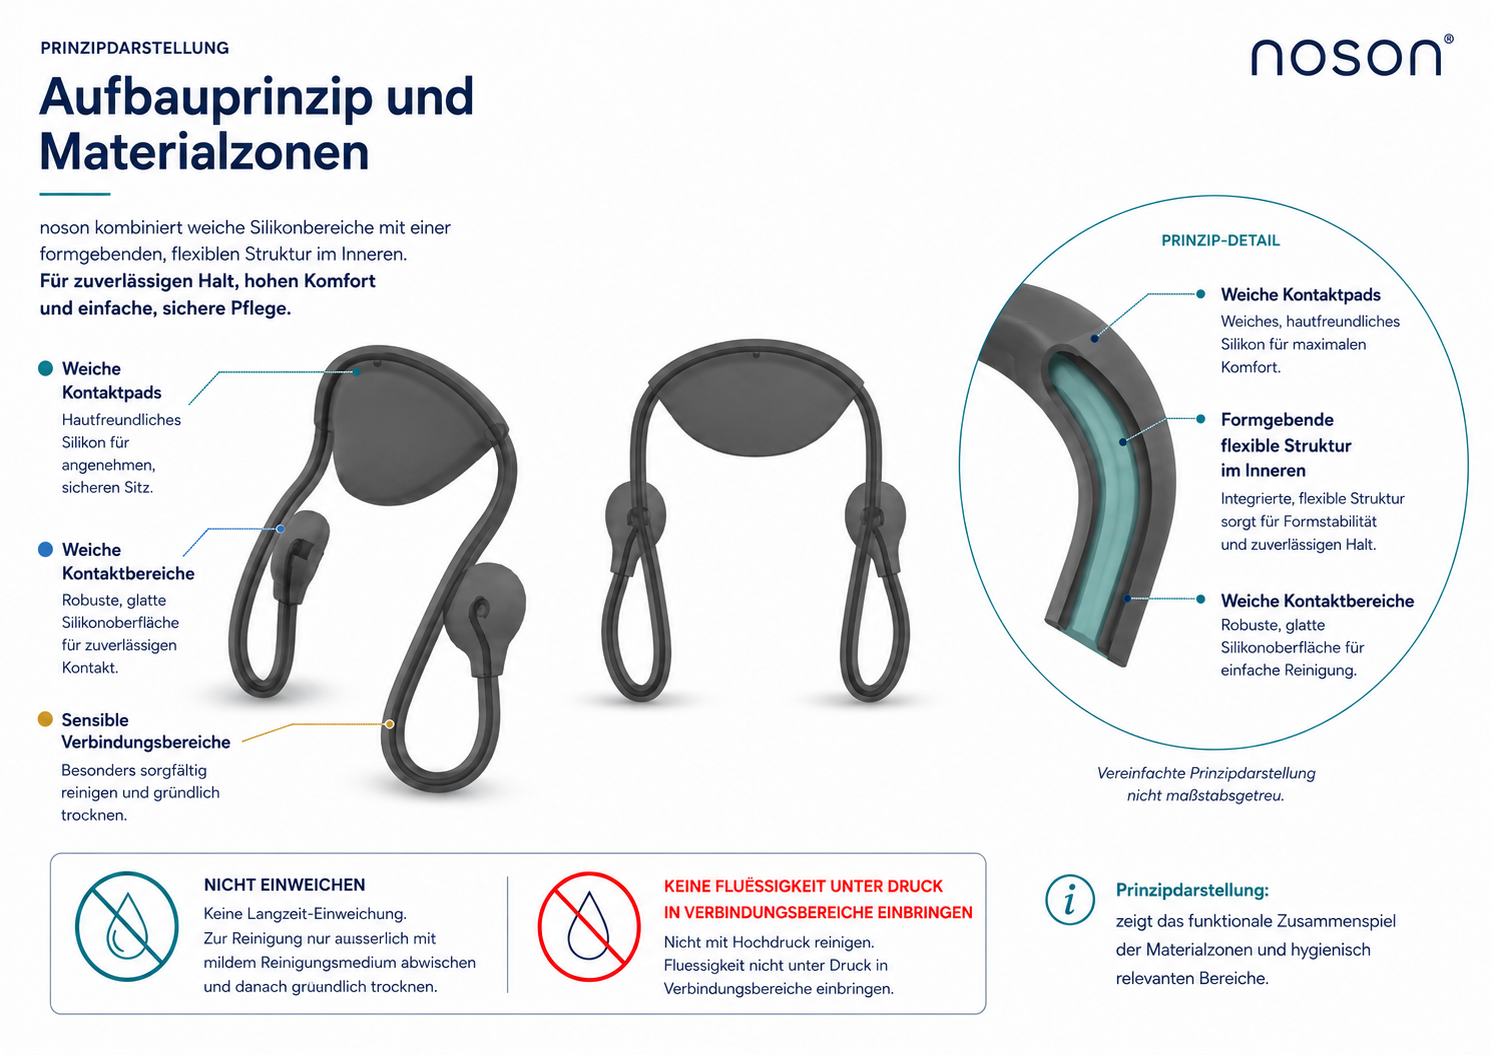
Protect material zones
Material protection is part of hygiene: keep surfaces smooth and clean, check shape stability, clean connection areas carefully and dry everything completely.
Hygiene video
Close to the Skin & Germ-Free
The hygiene video explores cleaning, drying, material protection and safe storage in greater detail. The product-specific instructions summarised above always apply to the noson® nasal dilator.
Note: These product and hygiene instructions are not a substitute for medical advice, diagnosis or treatment. Cleaning agents must not be used on mucous membranes, open wounds or irritated skin. Seek professional advice if discomfort persists or if you are unsure about use.